


Integrating chatbots into your Discord server is a lot of fun. The majority of chatbots come with pre-programmed messages for engaging with server users, such as welcome bot messages.
Applying machine learning and natural language processing to chatbot development is a fun method to learn more about bot technology. We'll look at some tools that can help you keep your bots running in the background even after all of your browser tabs and windows have been closed.
Let's get started
You can check out this article on Building a Discord Bot with Python and Replit.
Although there have been a few changes since then such as
Application IDinstead ofClient IDwhen setting up the bot on Discord.Also, Replit now hides the Environment Variables instead of creating a
.envfile. Please click on the lock symbol on the left to input your environmental variables
Looks like this:

Now that you have your basic Discord bot and Discord server all setup, let's proceed to make it a bit smarter and more fun.
To build our machine learning chatbot, we're going to need some tools:
Kaggle - data source
Google Colab - training and evaluation, GPU as well
Hugging Face - model hosting
DialoGPT - pre-trained models
Uptime Robot - keeping the bot online
In this case, our chatbot will mimic the Family Guy Character, Stewie.

Setting up and sourcing our data
We're going to use Google Colaboratory for data preparation, model training, and evaluation.
If you don't already have an account, you'll need to sign up. GPU will be necessary to train our model faster, plus Google Colab offers that for free.
To turn on GPU: go to Runtime > Change Runtime Type > Hardware accelerator > select GPU
You can find the Colab training notebook here: stewie-notebook
That said, we will be using Kaggle to source our data. Kaggle is an online community for data scientists and machine learning enthusiasts allowing collaboration and providing access to datasets, competitions, etc.
You can use Kaggle's CLI to connect the data. On how to do that, you can check out this article here. It'll involve you installing Kaggle, creating an API token on the platform, etc.
Or you can download the dataset from Kaggle and upload the csv directly to Colab.
Now to the next step...
Data Preparation
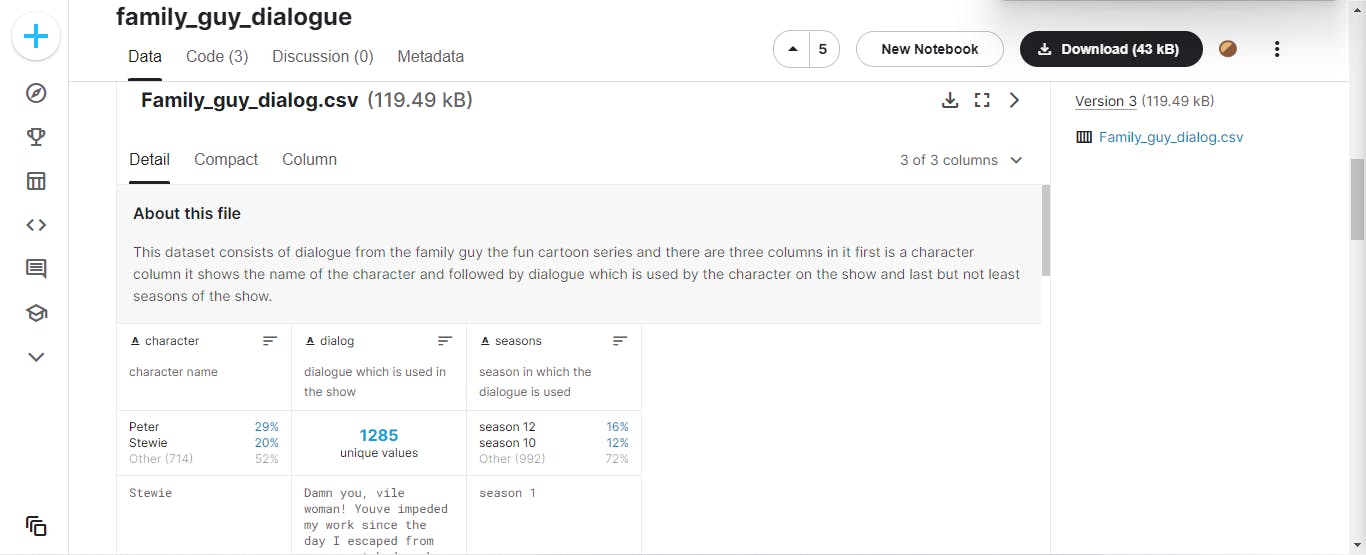
After importing all the dependencies we will be using for our project (as listed in the notebook), let's load our dataset and take a look at it using the read.csv() function in Pandas.
data = pd.read_csv('/content/Family_guy_dialog.csv')

Looking at our dataset, we have the following columns: character, dialog, and season.
We won't need the last column so we are going to drop it using the drop() function in Pandas.
data = data.drop(['seasons'], axis=1)
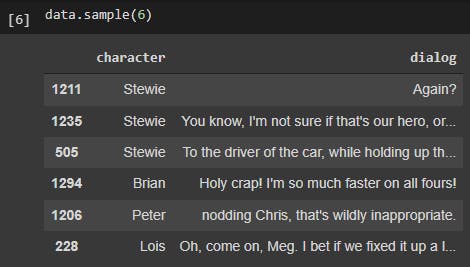
Let's take a look at 5 random samples of the dataset again:
data.sample(6)
Now our dataset looks like this:
Since we're basing our chatbot on Stewie, our character name will be:
CHARACTER_NAME = 'Stewie'
The aim of this is to convert the dataset so every response row will contain n (in this case 7) previous responses as a context.
contexted = []

# context window of size 7
n = 7

for i in data[data['character'] == CHARACTER_NAME].index:
    if i < n:
        continue
    row = []
    prev = i - 1 - n # we additionally substract 1, so row will contain current responce and 7 previous responces
    for j in range(i, prev, -1):
        row.append(data.dialog[j])
    contexted.append(row)

columns = ['response', 'context']
columns = columns + ['context/' + str(i) for i in range(n - 1)]

df = pd.DataFrame.from_records(contexted, columns=columns)
Let's take another look:
df.sample(6)
The result as shown below has the response and context columns. For fine-tuning our generative model, this will be useful to us.

Model Training
We carry out the usual train and test split.
Train, test split
trn_df, val_df = train_test_split(df, test_size=0.1)
Now we convert the dataset to a format suitable for the model.
This will concatenate responses in one string for each row.
# create dataset suitable for our model
def construct_conv(row, tokenizer, eos = True):
    flatten = lambda l: [item for sublist in l for item in sublist]
    conv = list(reversed([tokenizer.encode(x) + [tokenizer.eos_token_id] for x in row]))
    conv = flatten(conv)
    return conv

class ConversationDataset(Dataset):
    def __init__(self, tokenizer: PreTrainedTokenizer, args, df, block_size=512):

        block_size = block_size - (tokenizer.model_max_length - tokenizer.max_len_single_sentence)

        directory = args.cache_dir
        cached_features_file = os.path.join(
            directory, args.model_type + "_cached_lm_" + str(block_size)
        )

        if os.path.exists(cached_features_file) and not args.overwrite_cache:
            logger.info("Loading features from cached file %s", cached_features_file)
            with open(cached_features_file, "rb") as handle:
                self.examples = pickle.load(handle)
        else:
            logger.info("Creating features from dataset file at %s", directory)

            self.examples = []
            for _, row in df.iterrows():
                conv = construct_conv(row, tokenizer)
                self.examples.append(conv)

            logger.info("Saving features into cached file %s", cached_features_file)
            with open(cached_features_file, "wb") as handle:
                pickle.dump(self.examples, handle, protocol=pickle.HIGHEST_PROTOCOL)

    def __len__(self):
        return len(self.examples)

    def __getitem__(self, item):
        return torch.tensor(self.examples[item], dtype=torch.long)
Now we're ready to cache and store our data and checkpoints.
# Cacheing and storing of data/checkpoints

def load_and_cache_examples(args, tokenizer, df_trn, df_val, evaluate=False):
    return ConversationDataset(tokenizer, args, df_val if evaluate else df_trn)


def set_seed(args):
    random.seed(args.seed)
    np.random.seed(args.seed)
    torch.manual_seed(args.seed)
    if args.n_gpu > 0:
        torch.cuda.manual_seed_all(args.seed)


def _sorted_checkpoints(args, checkpoint_prefix="checkpoint", use_mtime=False) -> List[str]:
    ordering_and_checkpoint_path = []

    glob_checkpoints = glob.glob(os.path.join(args.output_dir, "{}-*".format(checkpoint_prefix)))

    for path in glob_checkpoints:
        if use_mtime:
            ordering_and_checkpoint_path.append((os.path.getmtime(path), path))
        else:
            regex_match = re.match(".*{}-([0-9]+)".format(checkpoint_prefix), path)
            if regex_match and regex_match.groups():
                ordering_and_checkpoint_path.append((int(regex_match.groups()[0]), path))

    checkpoints_sorted = sorted(ordering_and_checkpoint_path)
    checkpoints_sorted = [checkpoint[1] for checkpoint in checkpoints_sorted]
    return checkpoints_sorted


def _rotate_checkpoints(args, checkpoint_prefix="checkpoint", use_mtime=False) -> None:
    if not args.save_total_limit:
        return
    if args.save_total_limit <= 0:
        return

    # Check if we should delete older checkpoint(s)
    checkpoints_sorted = _sorted_checkpoints(args, checkpoint_prefix, use_mtime)
    if len(checkpoints_sorted) <= args.save_total_limit:
        return

    number_of_checkpoints_to_delete = max(0, len(checkpoints_sorted) - args.save_total_limit)
    checkpoints_to_be_deleted = checkpoints_sorted[:number_of_checkpoints_to_delete]
    for checkpoint in checkpoints_to_be_deleted:
        logger.info("Deleting older checkpoint [{}] due to args.save_total_limit".format(checkpoint))
        shutil.rmtree(checkpoint)
Now that our dataset is in a suitable format, we're ready for training.
Now we set up DialoGPT-small.
GPTs (Generative Pre-trained Transformers) are a type of language model based on transformer architecture that can be used to predict the next word after being given a sequence of words.
DialoGPT is a pre-trained dialogue response generation model for intelligent multi-turn conversations. We will be using DialoGPT-small but there are other model sizes available such as DialoGPT-medium and DialoGPT-large.
from transformers import AutoModelWithLMHead, AutoModelForCausalLM, AutoTokenizer
import torch

tokenizer = AutoTokenizer.from_pretrained("microsoft/DialoGPT-small")
model = AutoModelWithLMHead.from_pretrained("microsoft/DialoGPT-small")
Model Evaluation
And then train the model using DialoGPT.
Our model trains and is stored in a folder called output-small.
So we can get an even smarter model, we train using a larger model such as DialGPT-medium or DialogGPT-large.
The number of training epochs, num_train_epochs could also be adjusted.
Model Hosting and Deployment
We will be hosting the model on Hugging Face. If you don't already have an account, you're going to need to set one up.
Hugging Face is an open-source platform that provides NLP technologies for tasks such as summarisation, text classification, question answering, etc.

After model fine-tuning, you can deploy your model to Hugging Face.
First, create a new model repository New > Model
Create a Hugging Face API where you can upload your model.
Settings > Access Tokens > type in a name > select Write > create API token
- Next install
git-lfs, it is a git extension to upload larger files
!sudo apt-get install git-lfs
- configure git email and username
!git config --global user.name "your-username"

!git config --global user.email "your.name@email.com"
- use Hugging face API key and model name to upload both the tokenizer and model.
! pip install huggingface_hub

!huggingface-cli login
Updating our Backend on Replit
Back to our code on Replit, we are going to update the code in main.py.
Your code should look something like this:
from keep_alive import keep_alive

# the os module helps us access environment variables
# i.e., our API keys
import os

# these modules are for querying the Hugging Face model
import json
import requests

# the Discord Python API
import discord

# this is my Hugging Face profile link
API_URL = 'https://api-inference.huggingface.co/models/gigikenneth/'

class MyClient(discord.Client):
    def __init__(self, model_name):
        super().__init__()
        self.api_endpoint = API_URL + model_name
        # retrieve the secret API token from the system environment
        huggingface_token = os.environ['HUGGINGFACE_TOKEN']
        # format the header in our request to Hugging Face
        self.request_headers = {
            'Authorization': 'Bearer {}'.format(huggingface_token)
        }

    def query(self, payload):
        """
        make request to the Hugging Face model API
        """
        data = json.dumps(payload)
        response = requests.request('POST',
                                    self.api_endpoint,
                                    headers=self.request_headers,
                                    data=data)
        ret = json.loads(response.content.decode('utf-8'))
        return ret

    async def on_ready(self):
        # print out information when the bot wakes up
        print('Logged in as')
        print(self.user.name)
        print(self.user.id)
        print('------')
        # send a request to the model without caring about the response
        # just so that the model wakes up and starts loading
        self.query({'inputs': {'text': 'Hello!'}})

    async def on_message(self, message):
        """
        this function is called whenever the bot sees a message in a channel
        """
        # ignore the message if it comes from the bot itself
        if message.author.id == self.user.id:
            return

        # form query payload with the content of the message
        payload = {'inputs': {'text': message.content}}

        # while the bot is waiting on a response from the model
        # set the its status as typing for user-friendliness
        async with message.channel.typing():
          response = self.query(payload)
        bot_response = response.get('generated_text', None)

        # we may get ill-formed response if the model hasn't fully loaded
        # or has timed out
        if not bot_response:
            if 'error' in response:
                bot_response = '`Error: {}`'.format(response['error'])
            else:
                bot_response = 'Hmm... something is not right.'

        # send the model's response to the Discord channel
        await message.channel.send(bot_response)

def main():
    # family-guy-bot is my model name
    client = MyClient('family-guy-bot')
    keep_alive()
    client.run(os.environ['DISCORD_BOT_SECRET'])

if __name__ == '__main__':
  main()
Back to Discord
After connecting the API to our Discord bot. Your result will look sort of like this:

Keeping your bot alive
We can keep our bot alive using Uptime Robot.
Remember keep_alive we created for the backend?
article above? Import that in main.py.
We'll add that to the first line and include keep_live()
here:
def main():
    # family-guy-bot is my model name
    client = MyClient('family-guy-bot')
    keep_alive()
    client.run(os.environ['DISCORD_BOT_SECRET'])

if __name__ == '__main__':
  main()
This'll generate a link at the top right:
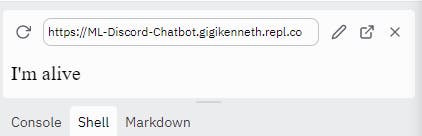
This is the link you'll copy and paste into Uptime Robot.
After you sign in, you should see this:

Click on Add New Monitor on the top left
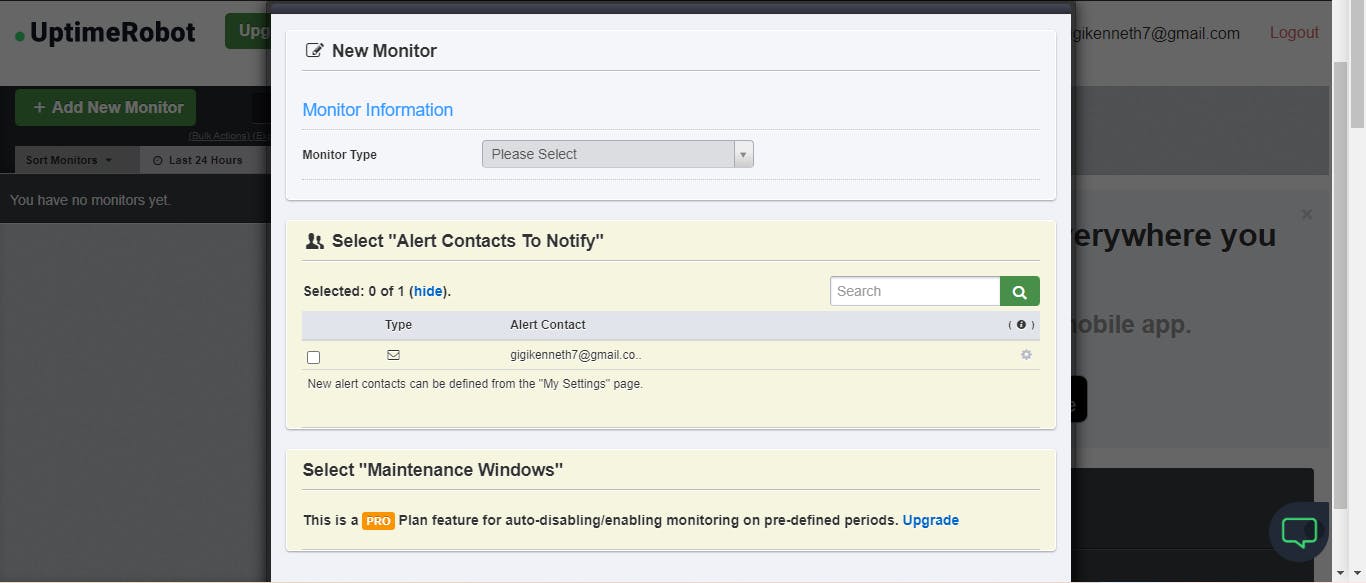
After selecting HTTPS in the first option, you should have this:

At the bottom, hit save, and you're all done!
You can try closing Replit and your bot should remain online still.
Conclusion
This was a fun project to work on a lot of the code was sourced from this awesome piece here. You can find the rest of the code in this repl.
I'm publishing this about a year after it was done because I didn't like the quality of the piece and some other things I had to get over so I imagine there could be some changes to some of the steps listed above.
I also got some help from a really cool senior software engineer who helped deploy the bot on Telegram with some additional features like Stewie responding with voice notes. You can check out the Telegram bot here.